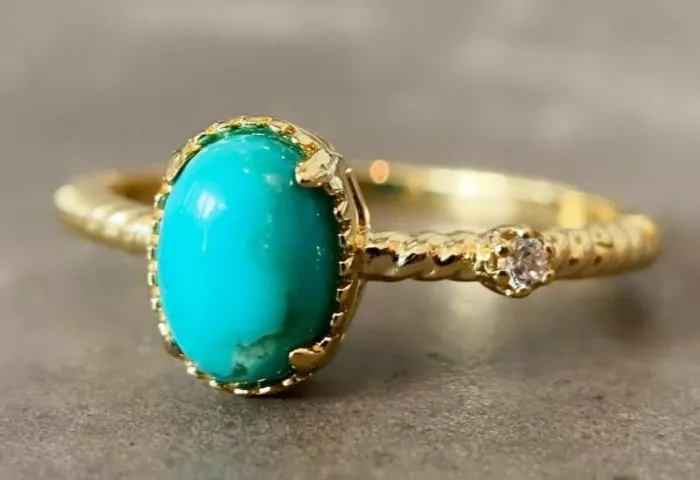
Turquoise rings are beautiful, unique, and full of character. Many people love wearing them, but have you ever wondered how they are made? Making a turquoise ring is a rewarding process that combines craftsmanship, creativity, and patience. Whether you are a beginner or an experienced jewelry maker, this guide will walk you through the steps to create your own stunning turquoise ring.
Introduction to Turquoise Ring Making
Turquoise is a soft gemstone, so working with it requires care. The process involves selecting the right stone, shaping it, setting it in metal, and finishing the piece. You can make a simple wire-wrapped ring or a more complex silver or gold setting. This guide will focus on a basic silver setting, which is beginner-friendly yet professional-looking.
Materials and Tools Needed
Before starting, gather all the necessary materials and tools. Here’s what you’ll need:
Materials:
A turquoise cabochon (a polished, dome-shaped stone with a flat back)
- Silver sheet or pre-made ring band
- Silver wire (for bezel setting)
- Solder (medium and hard)
- Flux (to help solder flow)
- Sandpaper (different grits)
- Polishing compound
- Ring mandrel (for shaping)
Tools:
- Jeweler’s saw
- Files (flat and half-round)
- Pliers (flat-nose and round-nose)
- Soldering torch
- Tweezers
- Bench pin (for sawing and filing)
- Burnisher (for smoothing metal)
- Dremel tool (optional, for polishing)
Step 1: Choosing the Right Turquoise Stone
The first step is selecting a good-quality turquoise cabochon. Look for:
Even color – Avoid stones with too many cracks or discolorations.
Smooth surface – The stone should be well-polished.
Proper shape – A dome-shaped cabochon is easiest for beginners.
Size – Make sure it fits the ring design you have in mind.
Step 2: Measuring and Cutting the Bezel Strip
A bezel is a metal strip that holds the stone in place. Here’s how to make one:
Measure the stone’s circumference – Use a flexible ruler or a strip of paper to wrap around the stone.
Cut a silver strip – The width should be slightly taller than the stone’s height.
Shape the strip into a circle – Use pliers to bend it around the stone.
Solder the ends together – Apply flux, heat with a torch, and add a small piece of solder.
Step 3: Preparing the Ring Band
You can either make a band from scratch or use a pre-made one.
Making a Band from Scratch:
Cut a silver strip – The length depends on your ring size (use a ring mandrel for sizing).
Shape it into a circle – Bend it around the mandrel.
Solder the ends – Just like with the bezel.
Step 4: Attaching the Bezel to the Band
File the bottom of the bezel – Make sure it sits flat on the band.
Position the bezel – Place it where you want it on the band.
Solder it in place – Use flux and solder to secure it.
Step 5: Setting the Turquoise Stone
Check the fit – The stone should sit snugly inside the bezel.
Push the bezel over the stone – Use a burnisher to gently press the metal around the stone.
Smooth the edges – File and sand any rough spots.
Step 6: Polishing the Ring
A polished ring looks professional. Here’s how to do it:
Sand the ring – Start with coarse grit and move to finer grits.
Buff with a polishing wheel – Use a Dremel or a polishing cloth.
Clean with soap and water – Remove any residue.
Alternative Method: Wire-Wrapped Turquoise Ring
If you don’t want to solder, you can make a wire-wrapped ring. Here’s how:
Choose a thick base wire – This will form the ring band.
Wrap thinner wire around the band – This will hold the stone.
Secure the stone – Twist the wire tightly around the turquoise.
Trim excess wire – Use wire cutters and file sharp ends.
Tips for Success
Work slowly – Rushing can lead to mistakes.
Practice soldering – If you’re new to it, try on scrap metal first.
Protect the stone – Avoid overheating turquoise, as it can crack.
Use proper ventilation – Soldering fumes can be harmful.
Common Mistakes to Avoid
Cutting the bezel too short – Always measure twice.
Overheating the solder – This can weaken the joint.
Not smoothing edges – Sharp metal can be uncomfortable to wear.
Choosing a brittle stone – Low-quality turquoise may break during setting.
Conclusion
Making a turquoise ring is a fun and creative project. With patience and practice, you can craft a beautiful piece of jewelry. Whether you choose a simple wire-wrapped design or a more advanced silver setting, the key is to enjoy the process. Once you finish, you’ll have a unique ring that you can wear or give as a special gift.
Would you like to try making one? Start with a simple design and improve your skills over time. Happy crafting!
Related topics:
How to Make a Turquoise Inlay Ring?
How Durable Is Turquoise Ring?
How Many Kinds of Turquoise Are There?


